
Did you wind up with way too much zucchini this year?
Maybe you planted a few extra zucchinis as backup, or maybe your neighbors snuck a few zucchinis onto your porch on August 8th. Maybe you just blinked, and all of a sudden your zucchinis turned into monsters!
Whatever it is, most of us gardeners find ourselves overwhelmed with zucchinis by the end of the summer.
Zucchinis grow very quickly and prolifically, and they don’t stop producing until the killing frost in the fall. They can easily become oversized and tough within a matter of days. I really don’t like to waste food, so I am always on the lookout for new ways to use up extra zucchini.
This year, I discovered a recipe that’s easy, very inexpensive and uses up a ton of zucchini: zucchini pineapple!
Canned zucchini pineapple, or mock pineapple, is perfect for those massive, overgrown zucchinis that seem to hide amongst the leaves and grow bigger and bigger before you finally notice them lurking in the bushes. It’s a great way to use up extra zucchini and save freezer space. And it costs next to nothing to make!
Use it in place of canned pineapple in any recipe. This is best used in baking or cooking rather than eaten plain.
Is canning zucchini pineapple safe?
This is a safe and tested recipe adapted from many trustworthy sources, including the National Center for Home Food Preservation (NCHFP). When doing home canning, it is important to only follow safe, professionally tested recipes. As tempting as it is to try any recipe you find online with nice pretty pictures, you need to make sure the recipe comes from a safe and tested source. I know that a lot of people say, “Well I’ve been doing it this way for so many years and I’ve never had any issues!” and while that may be true, if it doesn’t follow the safety standards for home canning, then I would not recommend it.
With that being said, what makes this recipe safe is the acidity of the pineapple and lemon juice. With all water bath canning, the acidity, or pH, is what makes a recipe safe for storage. It is important to follow the measurements for the pineapple juice and lemon juice exactly.
You must use canned, unsweetened pineapple juice and not juice made from frozen concentrate, and you must use bottled lemon juice and not freshly squeezed. The acidity in fresh lemon juice and pineapple juice is unpredictable and may not be safe enough for long term storage.
What equipment do I need to make canned zucchini pineapple?
Zucchini pineapple is canned using the water bath method. You’ll need the basic canning equipment:
- Water bath canner
- Pint or 500 mL jars with lids and rings
- Jar lifting tongs
- Wide mouth funnel for canning
- Chopsticks, plastic utensils or canning bubble popper to release air bubbles
What ingredients do I need to make canned zucchini pineapple?
The great thing about this recipe is that there are so few ingredients and very minimal prep work. All you need are the following ingredients:
- Zucchini
- Canned pineapple juice
- Bottled lemon juice
- Sugar
That’s it!
How to Make Canned Zucchini Pineapple (Mock Pineapple)
Step 1: Prepare Zucchini
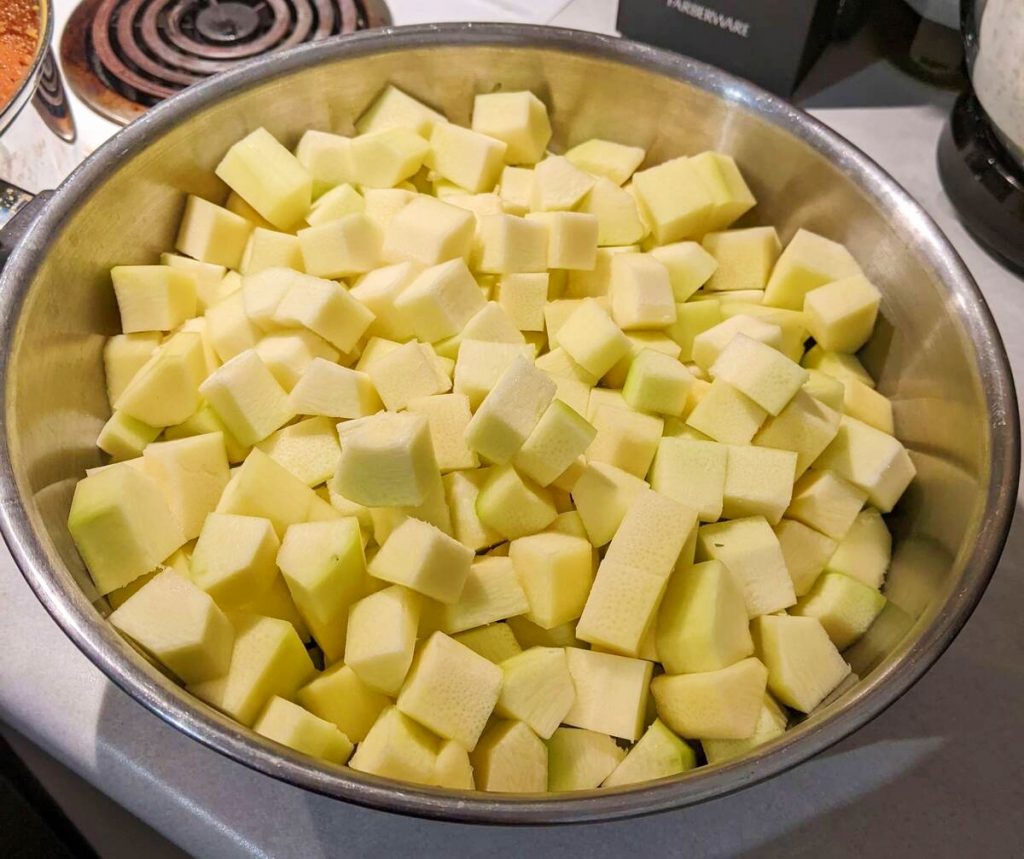
Start bringing your water bath canner to a boil. Wash and peel zucchini, and scoop out the insides if zucchini is large and seedy. Chop into ½-inch cubes (mock pineapple chunks) or shred (mock crushed pineapple).
Step 2: Combine Liquid and Zucchini
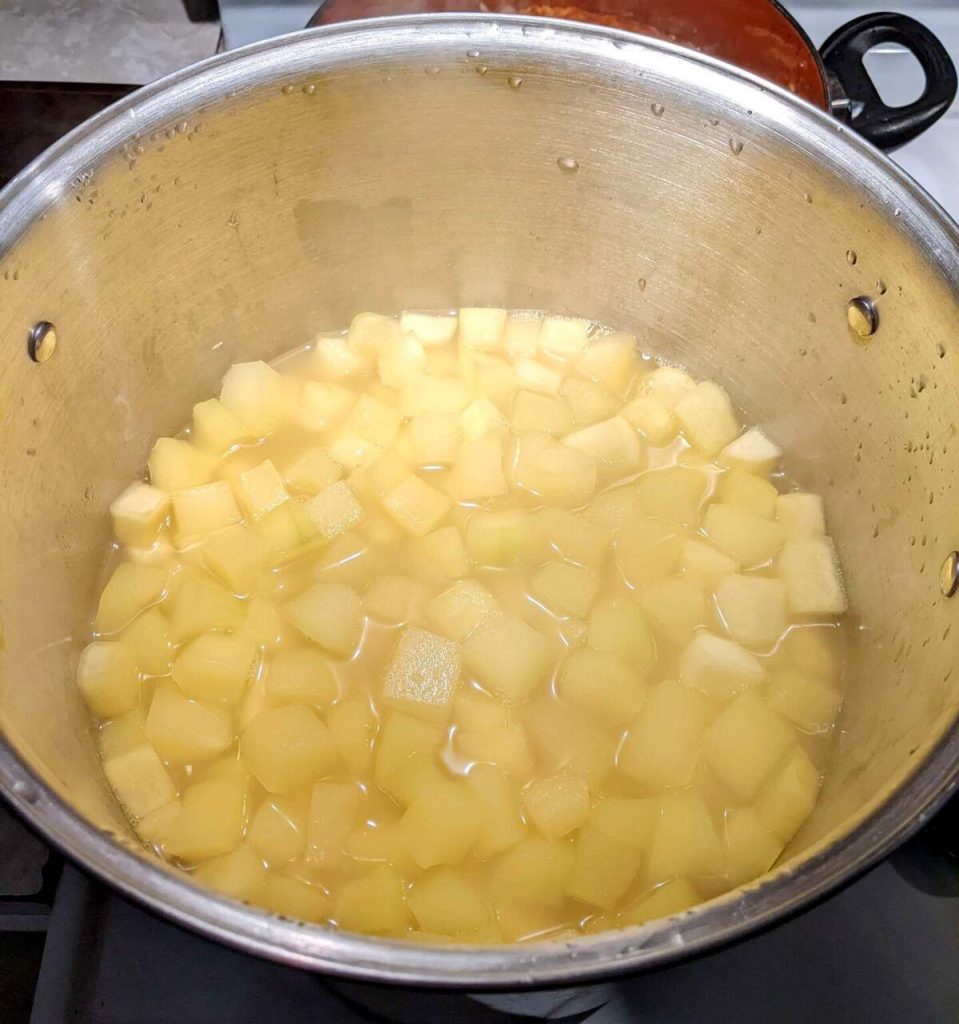
In a large pot, combine pineapple juice, lemon juice and sugar. Add zucchini and bring to a boil then reduce heat to low and simmer for 20 minutes. Start getting your jars ready while it is simmering.
Step 3: Prepare and Fill Jars
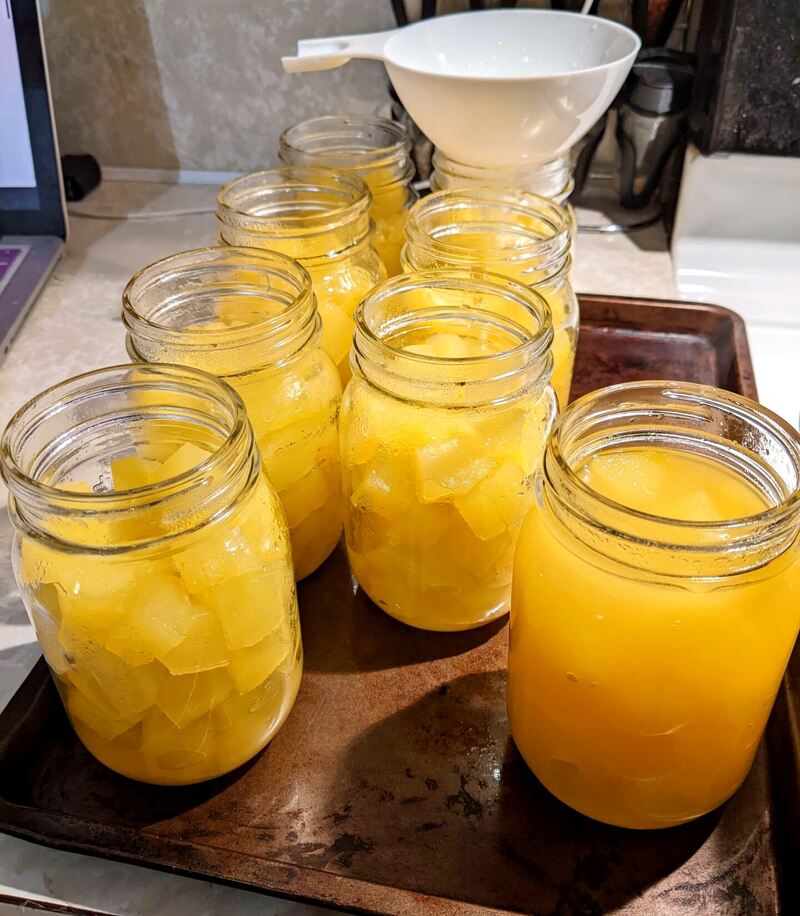
Wash jars, lids and rings in hot water. You can keep your jars and rings (but not lids) hot in your canner while waiting if you prefer. When mixture is ready, fill jars using your funnel to a ½-inch headspace. Try to fill with as much zucchini as possible while maintaining the headspace and ensuring they are completely covered by liquid. You do not necessarily need to use up all of the liquid.
Tip: For easy cleanup, place your jars on a baking tray while you fill them. Nobody likes a sticky mess all over the counter!
Using a chopstick, non-metallic utensil or canning bubble remover, release any air bubbles inside the jars and ensure they are still at ½-inch headspace. Wipe the rims of the jars with a wet paper towel and tighten lids to only finger tight.
Step 4: Processing
Your canner should be at a hard boil by the time you put the lids on the jars. Using jar lifter tongs, carefully place the jars in your water bath canner and process for 15 minutes at 0-1,000 feet, adjusting for altitude. Start your timer once the water is back to a hard boil. It must remain at a rolling boil during the entire processing time.
Processing time chart:
| 0 – 1,000 feet | 1,001 – 6,000 feet | Above 6,000 feet |
| 15 mins | 20 min | 25 min |
Once time is up, turn off heat and allow water to gradually stop boiling. Wearing oven mitts, open the lid away from you to avoid being scalded by the steam. Carefully lift jars out of the canner with your tongs and place on a heatproof surface such as cooling racks.
I put a towel under my cooling racks to catch all the water dripping off. Do not tilt jars or wipe them, no matter how tempting it is!
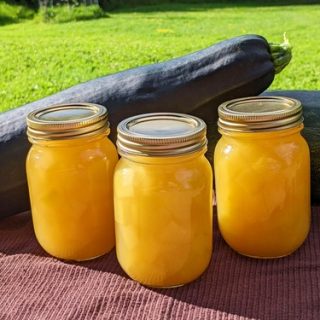
Let them sit for 24 hrs to ensure they are fully sealed.
Enjoy! The longer they sit, the more they will infuse with the delicious pineapple flavor. The texture is almost identical to cooked pineapple, which is why this recipe works so well!
Tips for Making Canned Zucchini Pineapple
- The sugar isn’t contributing to the safety of the recipe. It is for flavor, so if you want to cut back, you can use an alternative (although I am not sure if it will taste the same), and you can certainly add more sugar if you want.
- Do not reduce the amount of lemon juice, as this contributes to the pH and safety of the recipe. If it’s too lemony, add more sugar to offset it.
- Any leftover liquid can be canned on its own. But here’s the real tip: Because it’s so sweet and concentrated, it makes an excellent base for a pineapple-seltzer-vodka cocktail, or skip the alcohol and enjoy a spritzy pineapple drink!
Canned Zucchini Pineapple (Mock Pineapple)
Use up your extra zucchini or overgrown zucchini with this
super simple mock pineapple recipe! Only four ingredients and almost no cost to make.
Ingredients
- 16 cups cubed or shredded zucchini (about 6 lbs, measured after prepping)
- 46 oz canned pineapple juice, unsweetened
- 1 ½ cups bottled lemon juice
- 3 cups sugar
Instructions
- Wash and peel zucchini. Cut into ½-inch cubes for mock pineapple chunks, or shred for mock crushed pineapple. Prepare your water bath canner.
- Mix zucchini with the other ingredients in a large pot and bring to a boil. Reduce heat to low and simmer for 20 minutes.
- Prepare jars and fill with hot mixture up to ½-inch headspace. Try to pack in zucchini as much as possible while ensuring ½-inch headspace and that zucchini is completely covered by the liquid. Release any trapped air inside jars.
- Wipe rims of jars and adjust lids to finger tight. Process for 15 minutes up to 1,000 ft, adjusting for altitude (see chart in Step 4).
- Turn off heat after time is up and allow the water to stop boiling. Use oven mitts and open the lid away from you for safety. Remove jars from canner and place on heatproof surface without tilting the jars or wiping the tops. Let sit for 24 hours to ensure a complete seal.
Notes
- Use only bottled lemon juice and canned, unsweetened pure pineapple juice. Anything else cannot be guaranteed safe for home canning.
- Do not reduce the amount of lemon juice. You can always add more sugar if it is too lemony for your preference.


I made the mock pineapple and it is wonderful.
I’ll use it in recipes instead of pineapple.
The grandkids love it, eating it cold from the jar.